Showing posts with label notions and supplies. Show all posts

Wednesday, January 8, 2014

Dress Form Review (with Discount!)


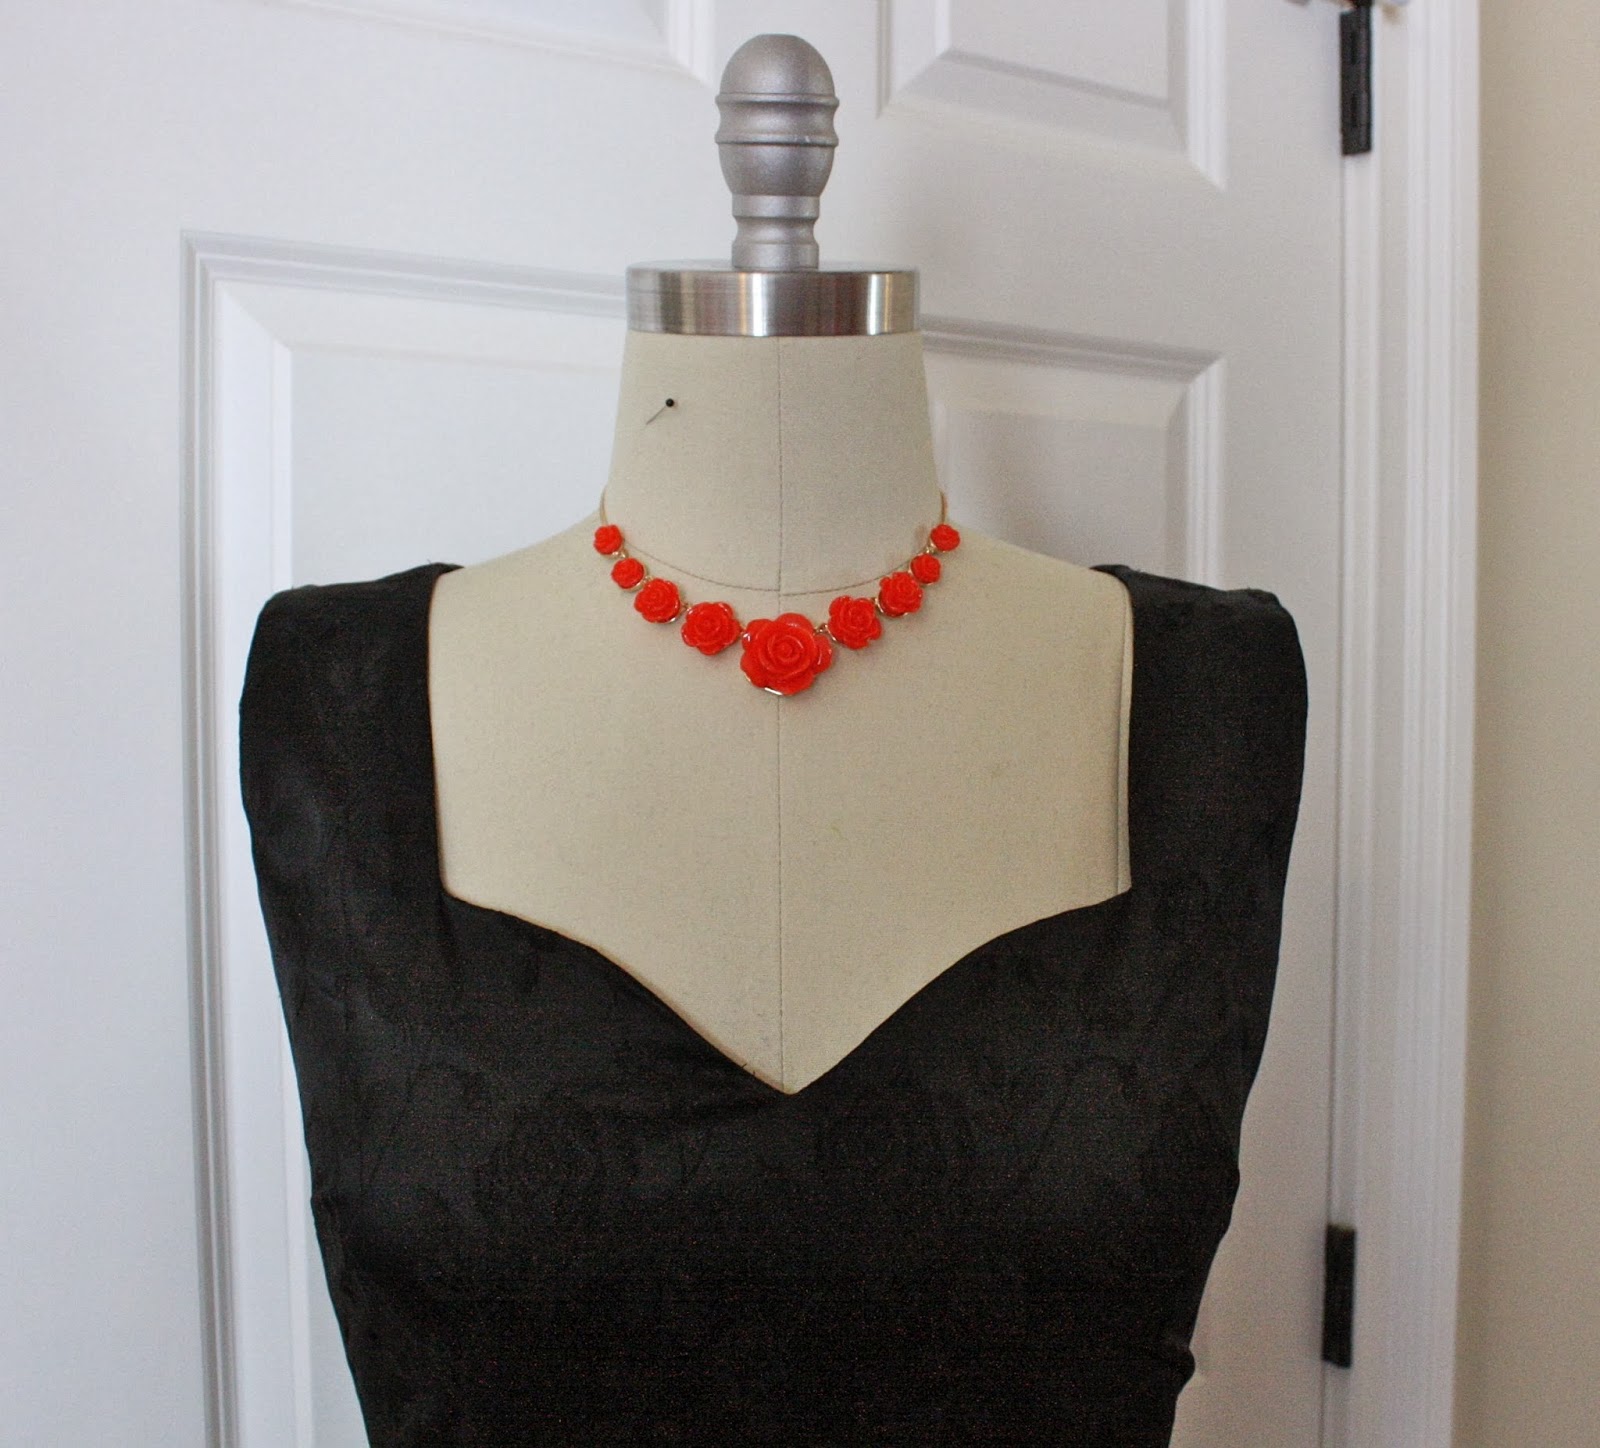
One thing that readers ask me often is if I can recommend a good dress form. I've purchased most of my dress forms second-hand, so I didn't really have a source to pass on. However! A site called The Shop Company recently contacted me and asked if I would like to review one of their forms. It seemed like a good opportunity since their forms are available online and are relatively affordable. 

They sent me a Professional Female Form with Collapsible Shoulders. It shipped in a large box and was super easy to put together. I had it up in mere minutes.

Here are the things I like about it: 

  • It's very sturdy and balanced, with a heavy metal base.

  • This form is professional quality and has all the marks you need for draping, patternmaking, and fitting: princess seams, armhole plates, side seams, neckline, waistline tape, under bust seams, etc. All these marks serve as guideposts when making a new design.


  • The cage helps get a level hem. 
  • The shoulders are collapsible so you can get garments on and off easily.
  • The side seams are raised so you can feel them through fabric. 
  • It's easy to raise and lower the form with the foot pedal
  • It's pretty! I love the simple linen cover.

  • It has a butt!

  • The cost is great. At $225 (plus a discount with this post, see below), this is a professional form at an accessible price. For comparison's sake, a Dritz dress form is $260 at full price, though you can often get 40% off with a Joann coupon. Still, I would recommend saving for one like the Shop Company sells. The Dritz forms aren't very sturdy and they lack the marks needed for draping. On the other end of the spectrum, a Wolf Dress Form (the highest-end brand) is $850 for a similar form. I have a vintage Wolf, and I feel that the Shop Company form is close enough in quality that it's an excellent affordable choice. 
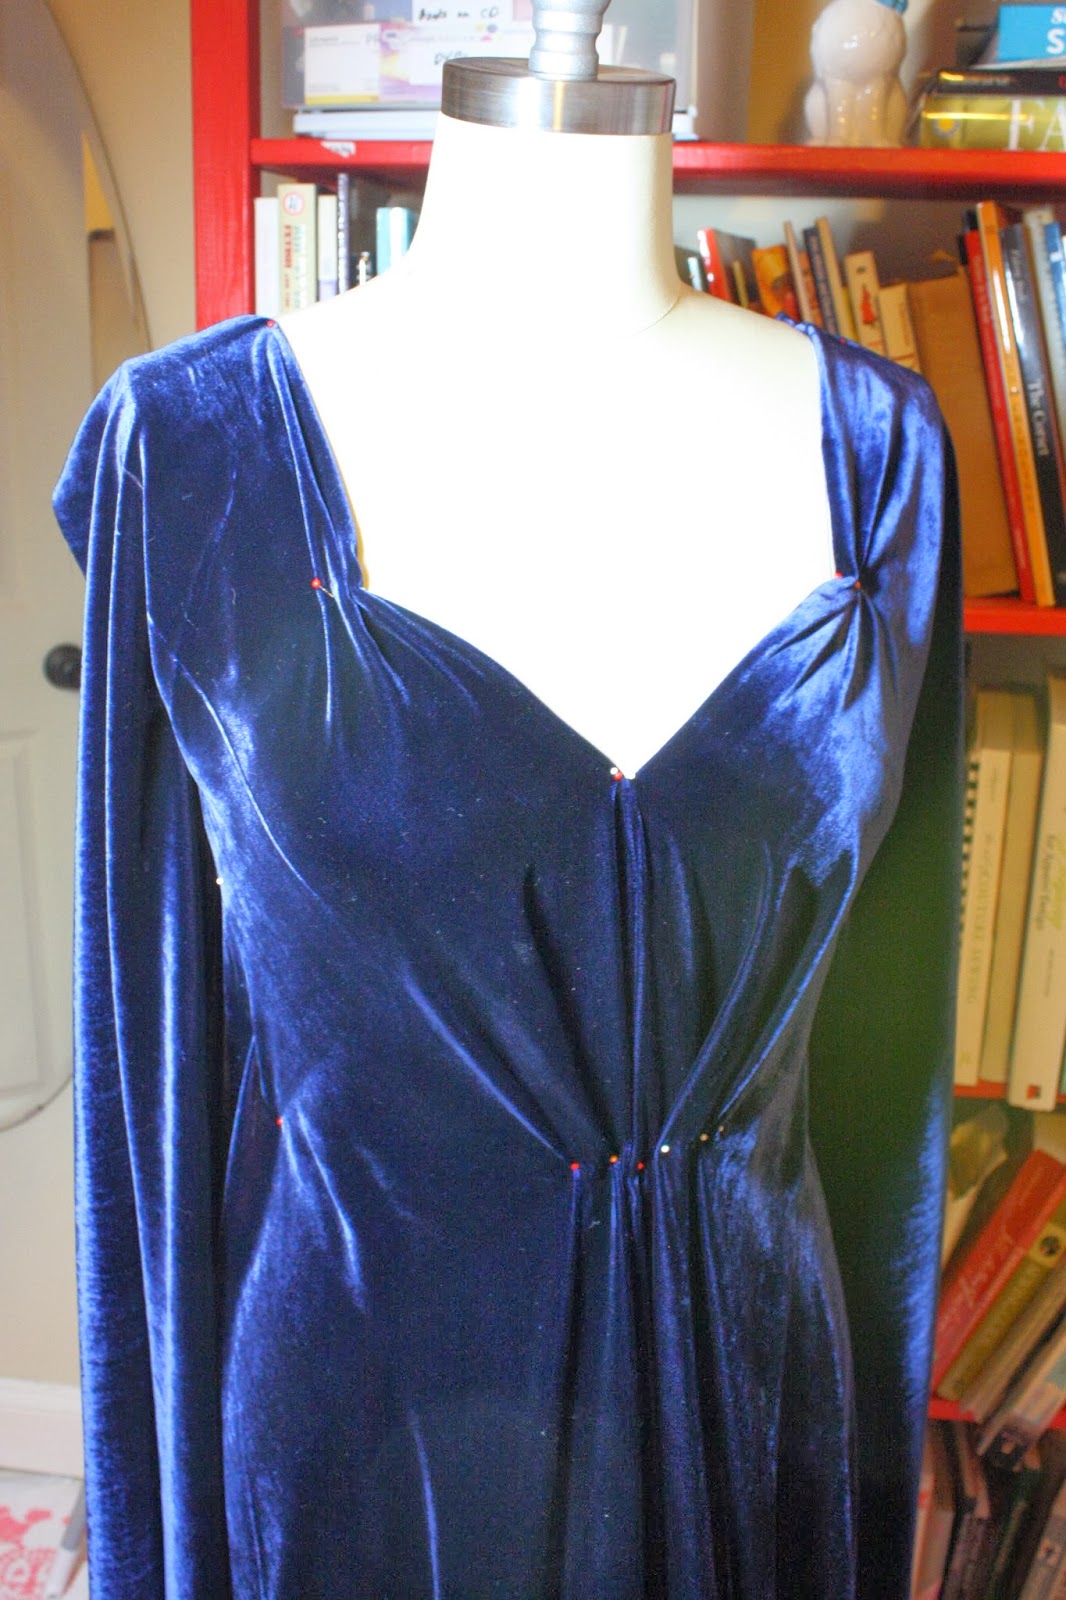
I did a little draping on the form in my lovely blue velvet to show you the creative potential of designing on a form. 


Fun!

On the flip side, here are some potential reasons this form might not work for you: 
  • Pinnability. (New word alert!) This dress form can be pinned at a side angle only, through the top linen layer only. This is standard for professional dress forms, but some home sewists look for forms that you can pin straight into. If that's the case, you might want to consider this fully pinnable dress form. It's cheaper than the professional form, but you miss out on some things like the collapsible shoulders, metal armhole plates to mark the armscye, and the cage bottom. It also doesn't raise or lower. I would recommend going for the upgraded model and learning to pin sideways--it comes naturally at a certain point. 

  • Size Range. My measurements put me at a size 12 dress form, and it's quite close to my figure. This range goes up to a size 20, which may be limiting for plus size sewists. 
  • Adjustments may be necessary. It's unlikely that any form is going to match your figure exactly. In this case, the hips are flatter than mine, so I'm going to need to pad the form. The best way to do this is with batting, which you can cover with a spandex tube. Then you'll need to transfer the forms marks to the outside with twill tape. (Hey, I should do I post on this, huh?) Anyway, my point is that it's not one of those forms that promises that you can adjust it to your exact size in no time flat. (And, for what it's worth, I have one of those forms and found the quality to be lacking.) 
Overall, I would highly recommend this form. It's a serious professional form at an affordable price. If you're looking for something that will help you design and drape, I wouldn't hesitate to recommend it to you. If your primary focus is fitting/replicating a hard-to-fit figure, then this may not be the form for you. In any case, I hope this review helps answer some questions about what to look for in a dress form. 

And finally: The Shop Company is offering 10% off their dress forms to my readers. Use the code TSCgiveMe10%off on the shopping cart page. Thanks, Shop Company! 

Tuesday, October 15, 2013

One Garment, Two Stay Tapes

The topic of stay tape is perennially interesting, don't you think? It also seems to be one of the least-understood notions. Lately, I've been taking pictures of stay tape when I apply it, to get a better understanding of its many uses. (If this topic is entirely new to you, start with my post, "The Wild World of Stay Tape" as a primer.)

Today I'm making a pair of shorts, and it turned out to be the perfect example of two different applications--as well as two different types of stay tape. Note: I'm using fusible stay tape from Emma Seabrooke. It's a fantastic product that comes in many varieties.

Okay, example #1: the zipper opening.

Here you see wide black woven stay tape applied to the center back seam, where an invisible zipper will go.


I chose 1-1/4" wide stay tape because it's double the width of a 5/8" seam allowance. When folded in, the seam allowance will be very stable. Added bonus: I insert invisible zippers by pressing in the seam allowances first, and the stay tape gives me a guide so I don't have to measure them.

The zipper opening is very important to stabilize. Have you ever sewn one side of a zipper, only to find that the other side is shorter and won't match up when the zipper is closed? That's because stitching a zipper in place can stretch out the fabric, making it longer than the other side. This is VERY annoying when you're trying to match up waistline seams!

Stay tape in the zipper opening seam allowances completely takes care of this problem. It also makes your zipper area look crisper and nicer.

Okay, on to the next area: the pocket opening.

 
These shorts have a very curved pocket opening, which easily stretches out of shape because of the fabric's bias. A narrow tape will stabilize the opening, preventing it from stretching during construction and wear.

In this case, I used a 1/2" knit stay tape. When stabilizing curves, it's crucial to use a stay tape that will curve as well. Knit stay tape can be manipulated around a curved seam. You can also find bias woven stay tape for this purpose. When stabilizing a seam like this, apply the tape so that it is centered over the seamline.


So there you have it--two real-world examples of choosing and using stay tapes!

Monday, June 17, 2013

Fruity Floral 40s Chiffon Dress

I found this amazing fabric last week, and immediately bought 15 yards for the shop. Of course, 3 of those yards were for me, ALL ME, readers. Because this has to be one of the best retro prints I've found in a while.  It's a fruit and floral print that veers far away from kitschy.

It has rose bouquets, baskets of cherries and strawberries, lemons, daisies, and basically all of my favorite novelty print motifs in one fabric. To top it off, the chiffon has an open weave mesh pattern running through it, forming a plaid on top of the print. (It's very subtle, one of those little things that makes a fabric special.)


I used Butterick 5744 as a starting point, because I liked the faux-wrap skirt and the neckline flounce. Plus the waistline seam is elasticized, so I knew it would be comfy for summer.


I made a few changes, as you can probably see. First, I added two inches to the hem length. It is super short right out of the envelope, and Gertie don't play that. Second, I omitted the lining because I wanted to play up the sheer nature of the chiffon. I'm wearing a light pink slip to cover up my unmentionables. Third, sleeves! I wanted a more 40s-inspired design, and also to show off the fabric a bit more. I borrowed the sleeve from New Look 6069, eliminating a couple inches of length. It's a puff sleeve so I didn't have to worry too much about pattern compatibility, and it fit right into the armscye of the dress. Also, I made the neckline a bit lower and wider because of the way I attached the flounce--I decided on a french seam at the last moment, which ate up a bit more seam allowance.

A few other construction things: I used the narrow hem on my serger for all the raw edges, in a contrasting ivory color. I like how it plays up the details of the dress, like the flounce.

I used french seams on the inside. I had a brilliant idea (if I may say so myself) about the waistline seam. The pattern calls for you to stitch the waistline seam, then stitch again 1/4" away--making a channel for the elastic. You insert the elastic with the old safety pin trick. I tried it, and was unhappy with how messy the raw edge of the chiffon was. I found myself wishing I could bind the seam allowances. And then it came to me--fold over elastic! I took out the elastic from the casing, and used the fold over elastic to cinch in the waist fullness and finish the raw edges of the waistline seam. (I am so weirdly proud of myself for thinking of this.)

Fold over elastic is basically an elastic binding that can be used to enclose edges of lingerie and other knits. It worked perfectly for this purpose too. I cut the elastic to fit snugly around my waist, folded it over the raw edge of the waistline seam allowances, and stitched it in place with a multi-step zigzag--aka serpentine stitch (though a regular zigzag is fine), stretching the elastic as I sewed it on. I had to first make sure the elastic was evenly distributed by dividing it into halves and matching it to the dress's side seams. Once it was sewn on, I steamed the elastic to shrink it back to size. It worked like a charm, and is so pretty on the inside.


Oh, one other pattern change: the directions called for a small snap to hold the wrap bodice in place, but I just tacked the layers together instead. The snap seemed unnecessary, plus I have an irrational hatred of sewing on snaps.


Perfect with red pumps!


This was a fast project, and the chiffon has a bit of body and was easy to sew. (I have 6 more yards of it for sale, if you're interested. Use coupon code HAPPYWEEKEND for 10% off until tomorrow.)

Hey, speaking of sales! Miss L-Fire shoes have been on sale several places and it's my civic duty to pass the info on to you. I found the Lola mules in navy for almost half off. (The rest of Sole Addiction's Miss L-Fire stock is on sale as well.)

At Anthro, the Casablanca slingbacks in black and red are half off. I picked up the black and white dot. (A very sick part of my mind thinks I should get the red as well, since I saved 50%. I mean, right?)


I resisted the Tease wedges, but they are very cute in navy and also on sale.

Enjoy!

Friday, June 14, 2013

Linings for Summer Dresses and Skirts

Bodice lined in Radiance silk/cotton blend fabric
I've noticed there's some confusion out there about linings--especially what kind to use for summer garments. So I thought I'd share some of my favorites.

First, let's discuss the requirements of a lining for a summer garment: breathability, affordability, fabric characteristics, and easy-care are at the top of my list.

1) Breathability: this is the comfort factor of the lining, in my opinion. I can't tolerate anything other than cotton or cotton blends in the bodice of a fitted summer dress. Even silk gets too sticky for me on a hot summer day.

2. Affordability: if you're sewing with a summer cotton for an everyday dress, I'm guessing you don't want the lining fabric to cost more than the garment fabric, right?

3. Fabric Characteristics: Are you sewing with a stretch fabric? Then you'll need a stretch lining. Is your fashion fabric sheer? Then you'll want your lining to provide opacity. (This is not to say that your lining fabric has to be completely opaque, but that it must add up to opacity when layered with your fashion fabric. Sometimes a slightly sheer lining can make a slightly sheer fashion fabric opaque.)

4. Easy-care: I like my summer dresses to be machine-washable and dry-able  so my lining needs to meet that criteria as well.

With these factors in mind, let's look at some possible linings:

1. Siri. This is a cotton/poly blend that is my go-to lining for summer garments. It's inexpensive, easy to care for, and the low poly content keeps it breathable. It's hard to find, which is why I started carrying it in my shop. I have both lightweight and medium weight, both in black and white. The lightweight is very drapey and airy and feels super soft against the skin. It drapes well with silk fashion fabrics like crepe de chine or chiffon. The medium weight siri has more body, so it works well with more structured garment fabrics like sateen, pique, poplin, quilting cotton, etc. The budget range is $4 to $6.50 a yard.


2. Imperial Cottons: Looking for something like siri but in a specific color? Try an Imperial Cotton. You may have come across fabrics labeled Imperial Batiste and Imperial Broadcloth, often for use in heirloom sewing. They are a 65/35 cotton/poly blend that comes in a rainbow of colors. The batiste is a good lightweight version, while the broadcloth has more body for medium weight fabrics. Here's an online source for batiste and broadcloth. In New York, B&J carries imperial cottons for a good price. The budget range is around $5 a yard.

3. 100% Cotton Voile: If your budget has a bit more room, then Free Spirit's Voile Solids make excellent linings. They wash and drape well. The colors are beautiful and the fabric has a silky smooth feel to it. You can buy them online for around $14 a yard. Here's a good source that carries all the colors and ships quickly.


4. 100% Cotton Batiste or Broadcloth: you can find beautiful pure cotton batistes and broadcloths usually intended for heirloom sewing. They are a bit pricier than blends but make the most sense if you prefer entirely natural fibers.

5. Radiance Cotton/Silk Blends: Another notch up on the fancy scale! This is a cotton and silk blend fabric that is often sold in quilting shops. It has a slippery texture on one side and is opaque. I've lined all sorts of garments with it (including wool skirts) and loved the results. Better for medium weight garments. Fabric.com carries a good selection for $16 yard. Because of the price, I reserve this for special garments.

6. Stretch Cottons: If you use a stretch fashion fabric, you'll want your lining to stretch as well. Stretch linings are hard to find and are usually polyester only, so I recommend looking in the fashion fabric sections. Anything called "stretch poplin" or "stretch shirting" should be a good match. Fabric.com has a bunch of cotton blend stretch poplins for around $6/yard, but I've never used them. Let me know if you have a preferred brand/source!

Keep in mind that you don't have to use the same lining fabric in the bodice and skirt of a dress.  For my blue and white brocade dress, I used cotton/silk in the bodice (for comfort), and silk crepe de chine in the skirt (for drape and slinkiness).


You can choose a more expensive, natural fiber fabric for the bodice and then use a cheaper synthetic for the skirt since it won't be as close to your skin. Or use a medium weight lining for the bodice to provide structure and a lightweight lining for the skirt for easier movement and flow. So many options.

I hope this helps a bit. Please share your favorite summer linings too!

P.S. A quick shop update (ignore if you're on one of those stash-busting fabric diets I keep hearing about--can't say I've ever tried one of those!). I added a bunch of new stuff recently (and will have more next week). I'm giving you lovely readers a discount this weekend! Enter code HAPPYWEEKEND to get 10% off your entire purchase. Expires on Tuesday, 6/18. 

Tuesday, May 14, 2013

Supply Source: Tissue Paper by the Roll for Cutting Slippery Fabrics

Remember this post, where I wrote about cutting slippery fabrics with tissue paper? Well, I've found a great source for industry-quality tissue paper. I asked the folks at Marist College (where I just finished up teaching a semester long course) where they get theirs, and they pointed me in the direction of South Star Supply Company, a Nashville-based business that provides sewing supplies to the garment industry. (Note: I'd never actually used this kind of tissue, since they had a different, mystery-sourced tissue paper in the studios when I was working at Marist.) South Star Supply also caters to us humble home sewists, making it very easy to place an online order. 

Their tissue paper is called "High Yield Tissue" and you can order it in widths from 30" to 72". I ordered a roll of 45" tissue, which had 900 feet on the roll, and cost $50 plus shipping. I chose the 45" width because that's the width of most slippery silks that I use. Did I mention it's pink? It's pink! Bonus points for coordinating with my hair and sewing room colors.

My only complaint about ordering from South Star Supply is that two of the other items I ordered were out of stock, so they placed my whole order on backorder without telling me. A couple weeks went by, and I contacted the company to see what was going on with my order. They were super responsive and offered to ship out the items they did have in stock (which included the tissue roll). I just wish they'd offered that when I placed the order! If you have an order that's urgent, I would recommend calling them to make sure the items are in stock and ready to ship.

I received the tissue shortly after my email conversation with customer service. When I unwrapped it, I was surprised by how thick it is--not like gift wrap tissue, which tears easily. This stuff is pretty beefy, and it has a coarse texture, which is perfect for preventing fabric slippage while cutting.

I cut out a dress lining using the tissue, and loved the results. A bonus to this thicker tissue is that you can use the leftovers as pattern paper, making it more economical than the thin tissue, which just gets thrown away.

You can even draft facings and other pieces from your leftovers! Here's a skirt piece after cutting.

To draft a skirt facing, I just used the top of the tissue to make a 2-5/8" facing piece.


Cool, huh? You could also use those extra tissue pieces to make variations on your favorite patterns.

Overall, a highly recommended product. If you're looking for thinner tissue paper, Uline carries 36" rolls, which have a whopping 5,200 feet on them. They cost $128, but will obviously last a long time. I think I prefer the South Star Supply stuff, though, since it's wider and has multiple uses.

Thursday, April 11, 2013

Reader Question: Will Tissue Paper Dull My Shears?


Yesterday I wrote about using tissue paper to stabilize slippery fabrics for cutting. A few readers brought up the question: "Won't using this method dull my shears?"

It's come to my attention over the years that my attitude on this subject is more lax than others'. I would never use my shears for the purpose of cutting regular paper, but cutting tissue with them does not bother me one bit. Here's the reason: any use--short of leaving your shears sitting unused in a drawer--will dull them. Think about kitchen knives. Even if you only use them for their intended purpose--slicing and chopping food--they dull considerably over time.

In the same way, even just cutting fabric dulls your shears. That's why shears (and knives) must be sharpened periodically. (You can actually take your shears to a knife sharpener, FYI.)

Yes, cutting tissue paper will contribute to the gradual dulling of your shears. But it will not make them irreversibly dull. Get them sharpened, and they'll be as good as new! In my opinion, using tissue paper makes cutting silks about 1000 times easier and more accurate, which is worth the slight extra dulling of my scissors. Though, honestly, I haven't noticed them getting any duller than usual with the use of tissue paper.

My problem is remembering to take my shears in periodically for sharpening! But it must be done.

What do you think, readers?

Tuesday, November 13, 2012

Butterick 5814: Construction and Fabric Details

As I mentioned yesterday, the construction of this dress is more complex than meets the eye. To give the bodice structure, it's boned along the darts and sides (on the lining). There's a waist stay (a grosgrain ribbon fitted snugly around the waist) to keep the bodice where it's supposed to be, and to support the weight of the skirt drape as well. Because the dress sits slightly off the shoulders, the waist stay also helps anchor the bodice so the sleeves don't slip off or ride up. The boning and the waist stay work together to these effects.

The pattern envelope calls for fabric for lining/underlining. What does that mean, you may ask? Great question. The bodice is lined traditionally. However, the skirt is underlined with lining fabric, meaning the fashion fabric and the lining fabric are hand basted together and treated as one. The underlining helps give body to the skirt pleats (underneath the drape), and also hides the hemming stitches. The fabric I used in the sample is a hot pink silk crepe-back satin, and it's almost impossible to hide hemming stitches without an underlining.

Speaking of fabric! The fabric used for this dress needs to have the right combination of drape and body. A draping fabric is important to accentuate the folds and drapes of the design. However, you don't want something too limp, as it will hang kind of sadly on the skirt drape. A crepe-back satin turned out to be perfect for the sample--drapey enough to showcase the design but beefy enough to make the skirt drape look full and dramatic.

The envelope calls for these fabrics: faille, crepe de chine, taffeta, and cotton damask. Butterick has experts who suggest the fabrics, and I trust them implicitly, but I admit I would have listed more fluid fabrics. Crepe de chine is in line with what I had in mind, as long as it has enough body for the skirt drape. Taffeta and faille are both more crisp than I had imagined. I don't think I've ever sewn with cotton damask, so I can't comment on that. If I had written the suggested fabrics, I think they would have been along these lines: crepe-back satin, 4-ply silk crepe, wool crepe, rayon crepe, lightweight wool gabardine. I hope I'm not being a jerk by contradicting the pattern envelope! As you know, these things can be very subjective. Butterick's fabric suggestions would certainly work; fabrics like faille and taffeta would just create a crisper look.

For my version, I'll be using a wool satin gabardine (like this one) for the fashion fabric and silk crepe de chine (like this) for the lining/underlining. The wool satin is a lovely deep wine/ruby color. It's fluid, but has a certain amount of body. But it's definitely not a crisp body, like taffeta.

As you're gathering supplies for this dress, I would recommend purchasing (I'm including links to some online suppliers I like as well):

  • 1/4" twill tape for stabilizing the neckline (a fusible stay tape would work as well)
  • Spiral steel boning (the envelope calls for plastic feather boning, but I prefer steel for its flexibility and strength). I keep a variety of lengths on hand, and cut them down to custom lengths. You'll also need boning tips for this purpose. Note: I cut my boning last night, and I ended up needing four 4" bones, and two 8-1/4" bones. This will vary by size however. I wear a size 14.
  • 1/2" Boning casing
  • Petersham ribbon for the waist stay, the rayon/cotton blends are more comfortable around the waist than poly grosgrain. 
  • Hooks and eyes for the waist stay and the back zipper.
  • A 20" zipper. I used invisible on the sample for a smooth look on the crepe, but a more vintage approach would be a regular zipper with a lapped application. The choice is yours!
Upcoming posts: I'll write about fitting my muslin this week. I'm also planning a tutorial on how to extend the raglan sleeves into 3/4 length for those who like a little more coverage!

Thursday, May 24, 2012

Your Iron's Auto-Off Feature: Friend or Foe?

Most irons seem to have one these days: the auto-off feature, that little mechanism that causes your iron to go into a "stand-by" mode when not in use. It cools down the iron's plate completely when not in use for a certain amount of time. In the case of my iron (which is the Rowenta Focus, if you're curious), the iron shuts off if it's been out of use for 8 minutes.

Now, there are times that I appreciate the feature. Safety first and all that. I've never been good at remembering to shut off hot things. Jeff has been terrified to find (on more than one occasion, I admit) that I've left the gas burner on after cooking. I mean, the thing has flames coming out of it! It's not exactly inconspicuous. So if I leave the house and have that "OMG I think I left the iron on" feeling, I don't have to fret. Also on the safety front, it's worth noting that my iron turns off after only 30 seconds if it's horizontal and not in use. Clever, huh?

On the other hand, the 8 minutes allotted for the vertical position seems a little stingy, right? That's just about enough time for me to sew a seam or complete some other mid-project tasks. You know the drill: when you go back to iron, the thing has shut off. Reactivating the iron (and waiting for it to heat up again) becomes one of those irksome sewing activities that takes the place of actually sewing.

If I had to choose again, I would probably still go with the auto-off feature rather than not have one at all. (So perhaps, in answer to the title of this post, it's my frenemy.) But perhaps there's an iron out there that's geared to people who might leave their iron idle for more than 8 minutes at a time? I'd love to hear your thoughts and experiences on this matter!

Thursday, March 15, 2012

Interfacing Insights from Fashion Sewing Supply (Plus Discount!)

Readers, I know that interfacing can be a tricky subject to understand fully. That's why I'm thrilled to have an interview with Pam Erny today, owner of Fashion Sewing Supply. Pam has interfacings custom milled to her specifications, and her products are widely thought of as the best available to the home sewing market. (I would have to agree; that's why I used her interfacings in my new online tailoring class!) I asked Pam some of my burning interfacing questions below. Read on for her answers, and for a special discount on Fashion Sewing Supply.

Why did you decide to start an Interfacing Business?

Many of your readers may know that I am a Professionally trained Shirt-maker and Tailor.  I decided to start Fashion Sewing Supply, when the Italian source for the interfacing I had been using for my personal sewing and for my clients' custom-made  garments was no longer available.  So, seven years ago...using my savings and begging for a loan from the bank, I started Fashion Sewing Supply. That sounds easier than it was, because the Interfacings already on the wholesale market did not meet my very picky standards. I could not find true "professional-grade" Interfacings to offer to my customers. That meant I had to design and manufacture my own line, by consulting with textile chemists and by contracting with mills to produce a full range of Interfacing types.

Why is interfacing important?

Interfacing is the foundation of any garment.  It's not a "second-thought" sewing product!  To have a great looking garment on the outside, we all need great quality interfacing on the inside.  Just like proper seam stitching: just because you cannot see it from the "public side" of your garment, it's still very important.
 
What makes your "Pro-Series" brand of Interfacing different than others?   

I firmly believe that  fabric should be supported by fabric. So all of my interfacings start with the best quality fabrics, not mill leftovers or that stuff that looks like paper.  And the fabric we use is milled very wide, we do not slice it up into narrow widths. Why? Wide interfacing saves you money, makes your layout easier, and one yard can often be used for many projects (and it goes a long way, especially since we always cut 38-inch "yards"). We then have those wide fabrics thoroughly steamed at the mill 2 times and then flash-dried with heat so that they do NOT shrink when you use them. Then the interfacings that are going to be made fusible have specially designed "finely crystallized" resins of the highest quality applied to their wrong side.  Since all of our interfacings do not shrink, none of that annoying "interfacing pre-soak/ pre-treat routine" is needed.  Fashion Sewing Supply  Pro-Series interfacing is ready to use right out of the box when it arrives at your door.

How do you recommend fusible interfacing be applied?

Regardless of what brand of interfacing you decide to purchase, always follow the directions.  And if your interfacing does not come with application directions, call the place where you bought it, and ask. At www.FashionSewingSupply.com, we include a detailed set of instructions with every order, and a PDF download of those instructions is  available in the Tutorial section of our site. And soon, more useful information about using  our Pro-Series interfacing will be available to download. In the meantime here are some links to some cool ways to use and apply interfacing (now on my blog site) that you might find interesting and useful:
 

What are some common mistakes sewers make when applying interfacing, and how can they be avoided?
The most common mistake I see and hear about, is not preparing/pre-treating the fashion (sewing) fabric you are using by washing, steaming, or dry-cleaning it before the interfacing is applied. Our Pro-Series interfacings from www.FashionSewingSupply.com do not shrink, but your fabric might. So please pre-treat your fabric!  If you see bubbles or ripples after washing your finished garment, it is for two possible reasons: 1. The interfacing you used was not of high quality and shrunk, pulling the fabric along with it.  2. Your fabric shrunk, and pulled the interfacing along with it. And one more very important thing...always follow the directions that come with your interfacing.

What are the types of interfacing you recommend every sewer have on hand, and why?
I am often asked this question, and I recommend that sewers have the following interfacings on hand, and because they are of such fine quality, even if you do not use them for years they will still be as "fresh" as the day they were milled.  And remember, because they are so wide, one yard goes a long way.

-- Pro-Weft Supreme Light (and Medium) Fusible Interfacing,
for most tailoring applications and collars/cuffs on shirts made from medium weight fabrics like flannel and denim.
-- Pro-Tricot Deluxe Fusible Interfacing,
for all weights of knit fabrics.
-- Pro-Sheer Elegance Fusible Interfacing,
for lightweight woven fabrics like dress/blouse-weight cottons and linens, cotton lawn, "silky" polyesters, and most silks.
--
And if you make classic shirts, having Pro-Woven Shirt Crisp Fusible Interfacing on hand will help make your shirts look like the expensive designer shirts you  see in upscale boutiques!

Gertie, in closing...I would like to offer your blog readers a special offer. Get 10% OFF  your entire purchase at www.FashionSewingSupply.com by using the Coupon Code GERTIE10 during checkout. This coupon-code will be good for 5 days, starting on the day this interview appears on Gertie's Blog. 
(And don't worry...if you have already purchased interfacing from us within the past few days, we added 10% more to each yard we cut for you :)

Tuesday, October 18, 2011

Cultivating a Scissor Arsenal

Scissors are no doubt one of a sewist's most important tools. It's all well and good to start out with a cheap pair of shears, but pretty soon you'll want to amass a collection of quality cutting tools, each having its own special purpose. I've spent the last couple years figuring out what works for me, so I thought I'd share. This list may seem like overkill, but I really do use all of these quite frequently!

  1. Paper Scissors: these should be inexpensive and plentiful in your abode. I seem to have a pair in every drawer, which helps avoid temptation to cut paper patterns with my fabric shears.
  2. Dressmaker's Shears: aka the most important pair of scissors you'll own. Get a sharp, high-quality pair that feels good in your hand and cut smoothly. I'm quite partial to my new Kai 10" Shears which are lightweight and smooth as butter. 9" or 11" may work better for you, so try out several. I put a fancy fabric scrap on my handle to discourage "borrowing."
  3. Serrated Shears: these aren't a necessity, but they sure are nice. These shears look like standard shears, but they have tiny serrations along the blade, which will help you cut slippery fabrics. You know how regular shears can push a slippery fabric away while you're cutting? The serrated shears grip the fabric instead, making it easy to cut. Of course, another option for slippery fabrics is a rotary cutter.
  4. Pinking Shears: I often use these to create a vintage-y finish for seam allowances. Simply trim the two allowances together and you're done!
  5. Tailor's points: I couldn't live without these 5" Ginghers. They're perfect for notching and clipping into layers of thick fabrics, like when you're tailoring a coat collar made of heavy wool.
  6. Embroidery scissors (top photo, middle): Great for getting into small places and for ripping stitches.
  7. Applique scissors: also called duckbill scissors, these ingenius little things have a curved blade that helps you isolate one seam allowance at a time to avoid cutting things you shouldn't. Great for baby hems and grading seam allowances.
  8. Snips: I keep these by my machine for quick cutting of threads. Mine are the dollar-bin variety, not these shiny ones.
    So that's it, my nearest and dearest scissors. Any you'd like to add, readers? 

      Friday, July 1, 2011

      Found! Zig Zag Wire Stays


      Just the thing you were looking for, right?

      I get so excited when I read vintage pattern instructions and they call for something really obscure. A great example would be this McCall's pattern that I bought last year because I loved the neckline.


      I haven't made it yet, but I did read through the envelope copy and instructions. (Yes, that's what I do for fun, okay?) You'll see on the back of the envelope that the pattern description and notions call for "zig zag wire stays." Have you ever heard of such a thing?


      I hadn't, so I was very interested to see how the pattern incorporated these stays. Late in the construction process, when the bodice is finished and has been attached to the skirt, the stays get hand stitched inside the neckline, right on top of the facing.


      Isn't that interesting? I would think they would get sandwiched between the facing for comfort. (Maybe they're on top so they can be easily removed for washing the dress?)

      The facings don't call for interfacing, so the wires would provide all the support for that crisp neckline. (There's a lot of interfacing elsewhere in the dress: the midriff, the collar, and--a bit oddly, I think--the entire slim skirt are fully interfaced.)

      Anyway, I assumed that these stays weren't something one could find anymore. But then I came across some! On Richard the Thread, you can buy these stays in packs of 100, in 3" and 7" lengths. (I wonder what you would need 100 of these for?) Richard the Thread is pretty theater-focused, so perhaps this something used in costuming. Any costumers out there familiar with them?

      P.S. Also, you should check out Richard the Thread for lots of other great stuff, like nice corset brocades and BIG sheets of wax tracing paper
      © Gertie's Blog For Better Sewing. Powered by Cake