Showing posts with label Butterick 6019. Show all posts

Tuesday, June 10, 2014

Finished Butterick 6019 in Shocking Pink

Yay--a dress made just for fun! This is my pattern, Butterick 6019, which I've been dying to make for myself since it came out last month.


Here's the line drawing, so you can see the two different views.

This pattern was inspired by the designs of Alfred Shaheen, and I developed the pattern by draping it, which was both challenging and fun. 

One of the main features of the dress is the bias strip that crosses over the bust. In the pattern, the instructions tell you to tuck the right side of the bias band into the side seam, but I decided to experiment with seaming it and leaving it out. I think it looks pretty cool!
The fabric is an amazing silk shantung woven from hot pink and orange threads. It practically glows. I bought it in Salt Lake City maybe three years ago, and I'm thrilled to have finally sewn it.
 
There's a lot of understructure in this dress. Let's start with the skirt. I underlined in in silk organza, and used hem lace at the bottom. I decided to use horsehair braid on the skirt lining--I saw this recently when I was lucky enough to look inside a couture gown. It makes so much sense! You get the structure of the horsehair braid, but you can't see it on the outer fabric. (For instructions on sewing with horsehair braid, see this post and this video!)


Here's the dress inside out. The horsehair braid is hidden between the skirt layers. 


(Oh, BTW! The pattern doesn't call for a skirt lining, but I added one made of cotton broadcloth.) I also lengthened the skirt by about 3 inches, for a more tea-length vibe.

The bodice has all sorts of stuff. 


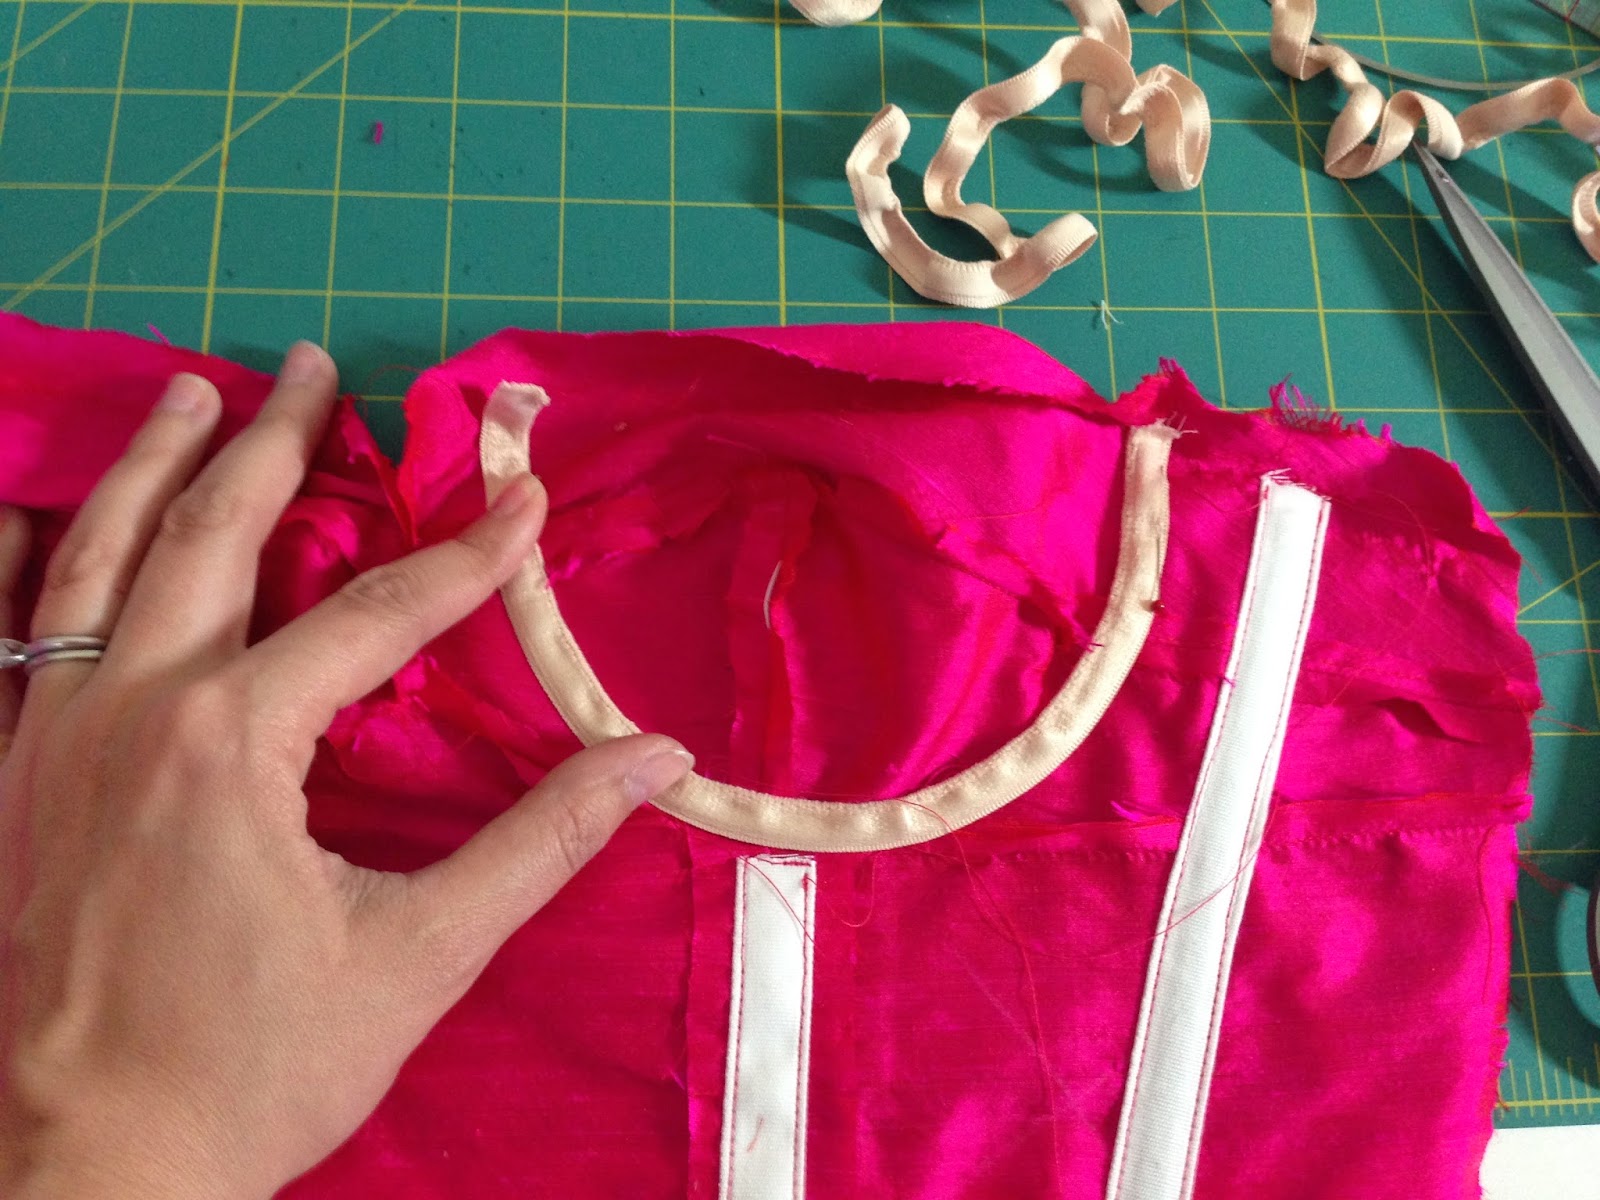
I added a grosgrain waist stay, underwires (see tutorial here), bra cups, and interfacing. There's fusible batting to support the outer cup, and steel boning throughout. 

There are two sections of elastic shirring in the back. I used 1/8" strips of elastic sandwiched into channels rather than elastic thread, which I'm going to put into a tutorial soon. 

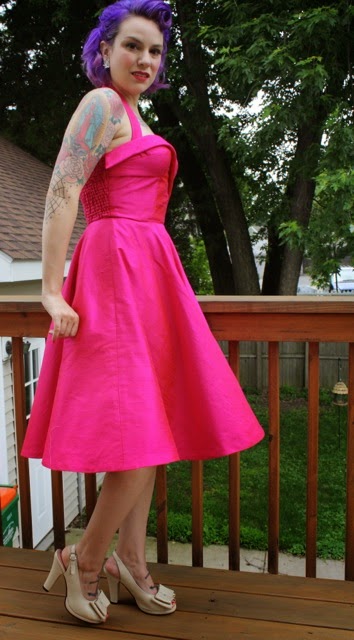
I'm super happy with how the dress turned out. Which is good, because I put a lot of time into it! 


This is a really fun pattern to sew, and it makes me feel like a movie star. So, two thumbs up! (Wait, I can review my own pattern, right?)

Has anyone else made this one yet? I'm looking forward to doing another version with the slim skirt.

Friday, May 23, 2014

Adding Underwires to a Bustier-Style Bodice


This has got to be one of my most frequently asked questions: how do you put underwires into a dress? (Especially one like my bombshell dress or other bustier-style design.) Is it possible? To be honest, I really didn't know. So I decided to spend some time exploring the possibility while making B6019, my Butterick Shaheen-style dress pattern. You'll need a pattern with a underbust seam and, ideally, some sort of bra cup seaming.

This pattern is ideal because it has a bodice lining. The underwires will get stitched to the lining only, so that the stitching lines don't show on the outside. If you wanted to put underwires into an unlined bodice, it would need to have actual bra cups (that are the shape of an underwire) or you would have to not care about underwire stitching lines.

Here's how I started. Construct the bodice front lining and add boning channels where desired. Practice positioning the underwires and see if you're happy with how they fit by holding the bodice up to your torso. The underwires should not extend past the top of the neckline. (Tip: you can remove underwires from a worn out bra to avoid having to buy them--plus you'll know they're the right size!)


Place the underwires into channeling. (If you don't have channeling, 1/4" wide bias tape could work in a pinch.)


Mark the underwire placement. It's very important to remember that the underwires will expand when worn. See how I'm stretching them slightly open with my hand in the picture above? This is how you want to mark the placement. Add some chalk lines while stretching the underwire open so you know where to stitch the channeling. The bottom of the underwire should match the underbust seam.


Remove the underwires from the channeling and pin the channeling in place along your marked chalk lines. Stitch along each side of the channeling.


Put the underwire back into the channel and secure the open ends of the channel with stitching. Repeat on the other side of the bust.

Prepare the outer bodice front. I put fusible fleece in the cups for support and woven interfacing in the midriff.


Complete the bodice as usual. Here's how the underwired lining looks from the inside.


I ended up adding some thin circular bra pads between the layers for a little extra oomph--the upper cup was collapsing a bit on my smallish bust (sad, I know). 

And here's the outside!

You want support? This thing is super supportive! Plus it has elastic shirring in the back to hold it snug to the body, and a halter strap for a little extra lift.

Hope this is helpful! Do you all have any other tips for sewing underwires into a dress?

P.S. This method would work for a swimsuit too!

P.P.S. I'll be back with the sew-along on Monday! I'm going to do a video to show y'all how to make bra straps.


Tuesday, January 14, 2014

My New Butterick Patterns for Spring 2014!

Exciting day! I have two new pattern designs that just released. The first is B6019, and it's a dress I've been dreaming of for a long time. Ever since I did the Bombshell Dress class on Craftsy, I've wanted a dress pattern that was more authentic to the designs of Alfred Shaheen. Here are a couple of his designs from the '50s, to give you an idea.


I love the details: the bias band across the bodice, boned bodice, structured bra cups, removable halter strap, sarong skirt, and elastic shirring. So I designed a pattern to these exact specifications. Here's the line drawing.


As you can see, there's a full-skirted version in addition to the sarong version.


The bra cups have batting for structure.

There's shirring in the back panels, and a lapped center back zipper.


The second pattern is very different: lingerie!

B6031 was inspired by vintage lingerie, but is made in modern stretch fabrics. As much as I love the look of vintage slips, I find the nylon fabric they're made of to be sticky and uncomfortable.

So I designed something similar in matte jersey. This is an entire lingerie set with slip, camisole in 2 lengths, and panties.

All the designs are finished with stretch lace and pretty bows.

The undies are my modern interpretation of vintage style panties. They have full butt coverage and low-cut legs but the waist is shaped more like a boyshort. You can make them higher waisted for an authentic '50s look!

I hope you enjoy the new patterns! I'm looking forward to hearing your thoughts.
© Gertie's Blog For Better Sewing. Powered by Cake